After a Car Accident: Step-by-Step Claim Guide, What to Say, and What to Avoid
A simple mistake after a crash can delay payment or reduce your settlement. Learn a calm, step-by-step checklist, how the claims timeline works, and how to protect yourself during repairs.
Accidents are stressful — and that stress is exactly why people make expensive mistakes. The best claims outcomes usually come from a simple plan: document, report, repair, and follow up. This guide gives you a clear checklist and explains how the auto insurance claims process works in real life.
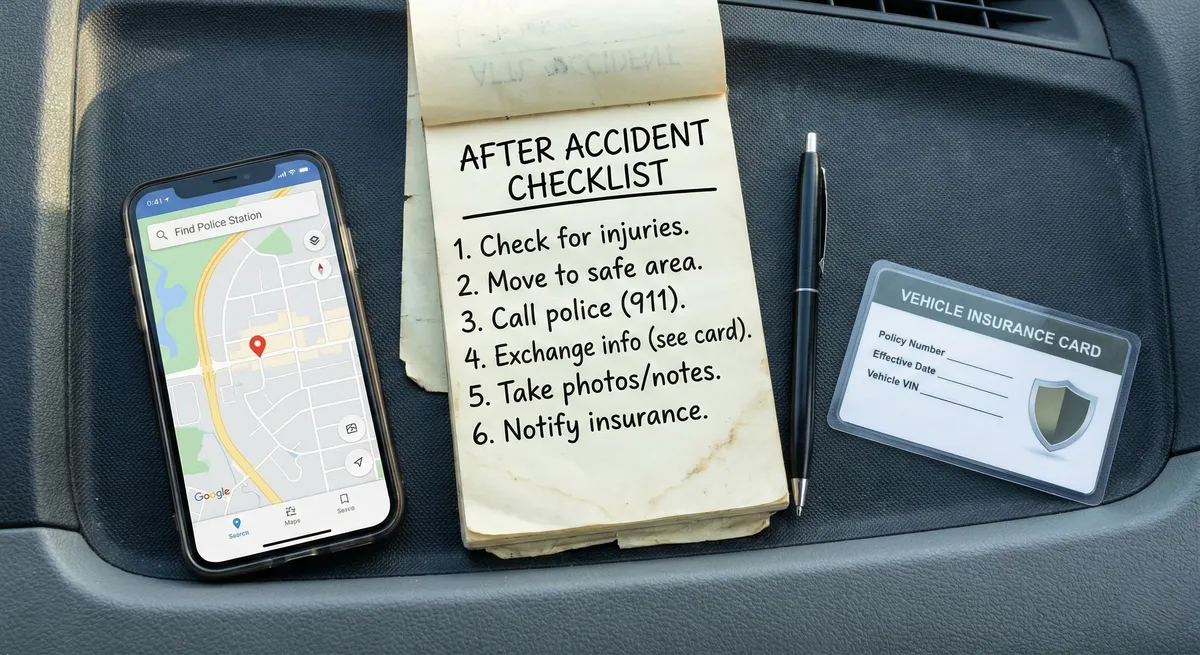
Step 1: Safety First (Then Evidence)
- Move to a safe location if possible and turn on hazard lights.
- Check for injuries and call emergency services if needed.
- If police respond, get the report number and the officer’s name.
Step 2: Collect the Right Info (In 5 Minutes)
You don’t need to argue fault on the roadside. You need facts:
- Driver name, phone, license number
- Insurance company + policy number
- Vehicle plate + VIN (photo is fine)
- Photos of all vehicles, damage close-ups, and wider scene shots
- Witness contact info (if available)

Step 3: What to Say (and What Not to Say)
You can be polite without assigning blame. Fault is determined later using evidence, statements, and reports.
Step 4: File the Claim the Smart Way
You generally have two paths: file through your insurer or the other driver’s insurer. Filing through your insurer can be faster (they may later recover costs via subrogation), but deductibles may apply depending on the situation.
Typical claim timeline
- Claim opened: You provide details + photos.
- Adjuster review: They assess liability and damages.
- Estimate: Shop estimate or adjuster estimate.
- Repair / total loss decision: Repair approved or vehicle valued as total loss.
- Payment: Paid to you, the shop, or lienholder depending on the case.
Repairs: Your Rights and Common Traps
- Preferred shops: convenient, but you can usually choose your own shop.
- Aftermarket parts: policies vary; ask what parts are approved and why.
- Hidden damage: supplements are normal — more damage is found after teardown.
- Diminished value: in some cases you can claim lost resale value (rules vary).
Total Loss: How Valuation Works
If repairs exceed a threshold of the vehicle’s value, the insurer may declare it a total loss. Valuation is typically based on comparable vehicles, condition, mileage, and local market data. If you disagree, ask for the valuation report and verify comps (trim, mileage, options).
Coverage Reminders That Change Outcomes
- Collision: pays for your car after a crash (deductible applies).
- Comprehensive: pays for theft/hail/vandalism/animals (deductible applies).
- UM/UIM: protects you if the other driver is uninsured or underinsured.
- Rental reimbursement: helps you stay mobile during repairs.
Quick Checklist (Save This)
- Photos: scene + damage + plates + insurance cards
- Report number (if police involved)
- Witness contacts
- Claim number + adjuster contact
- Repair estimate + timeline updates